ORICO Aluminum Dual-bay M.2 NVME + SATA SSD Enclosure

Sale price$39.99

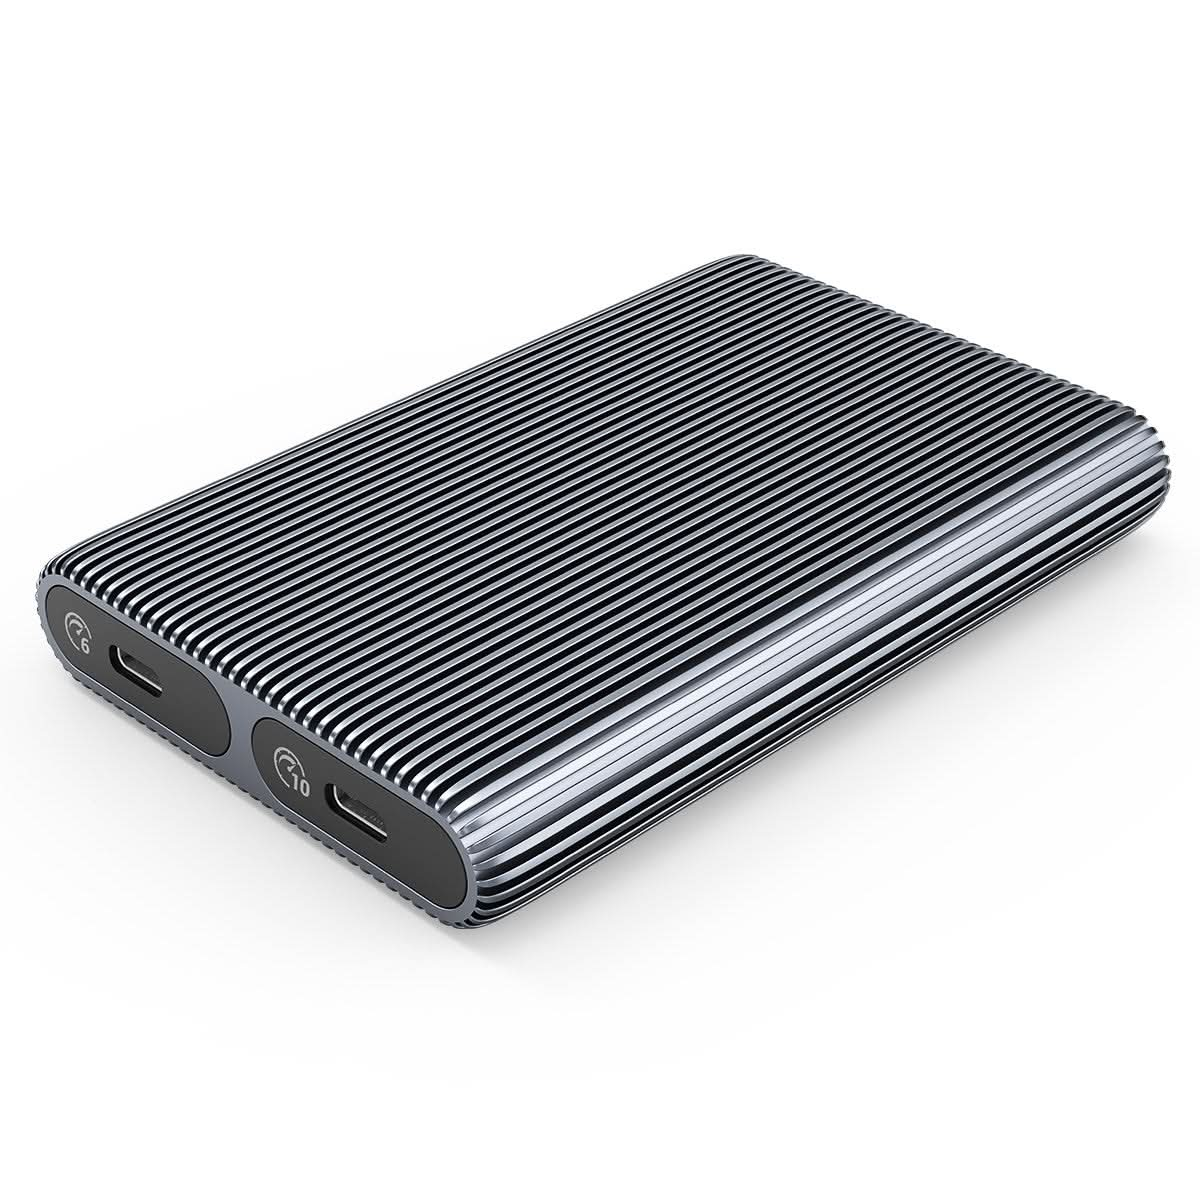
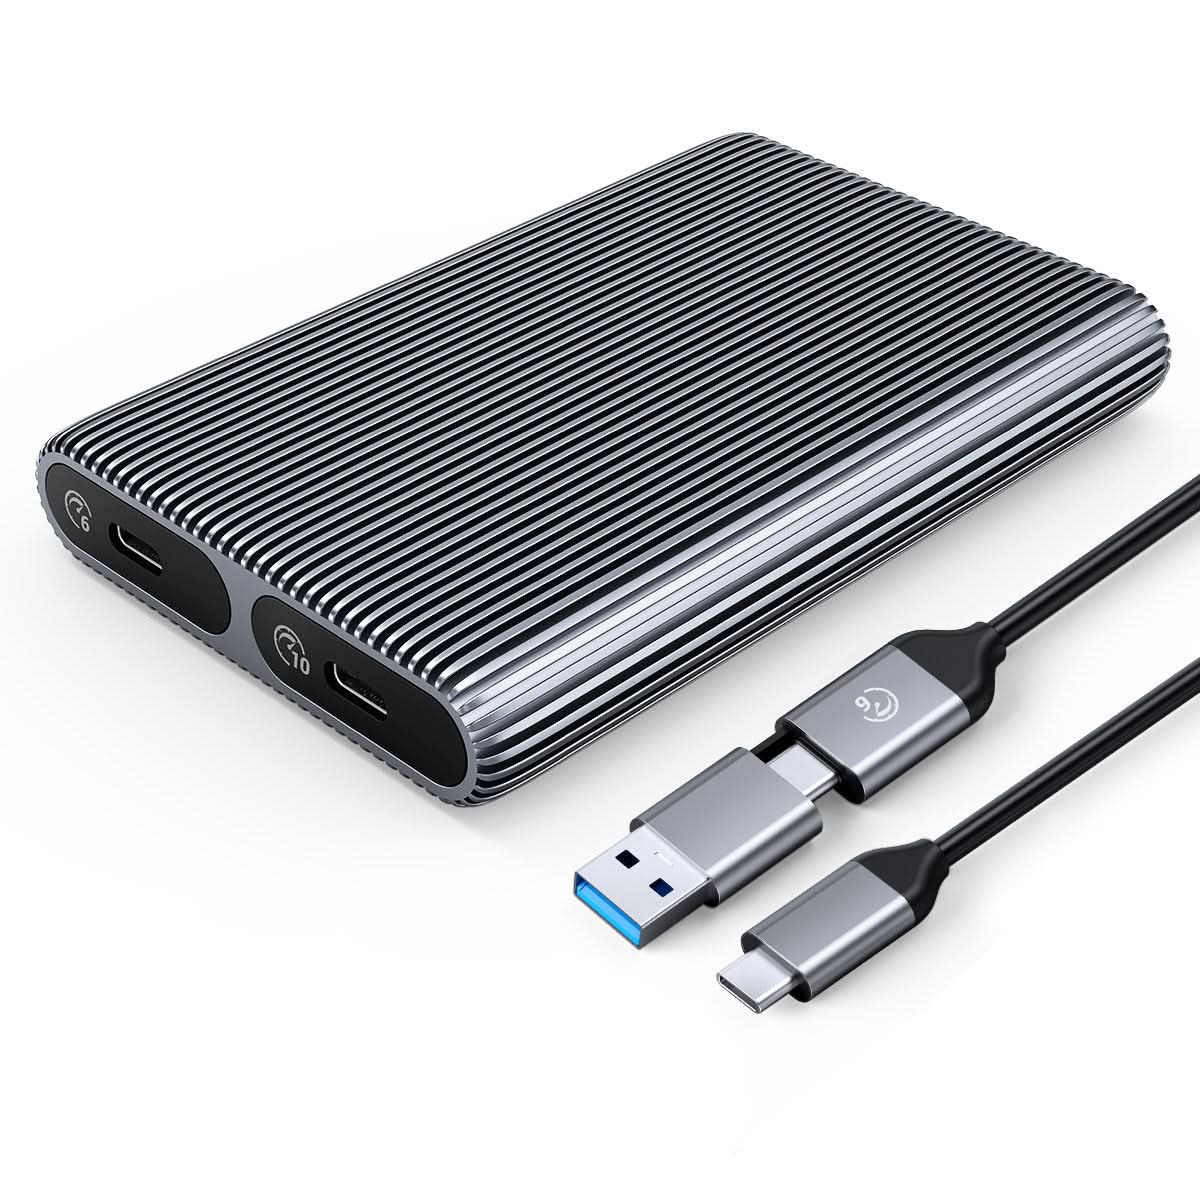
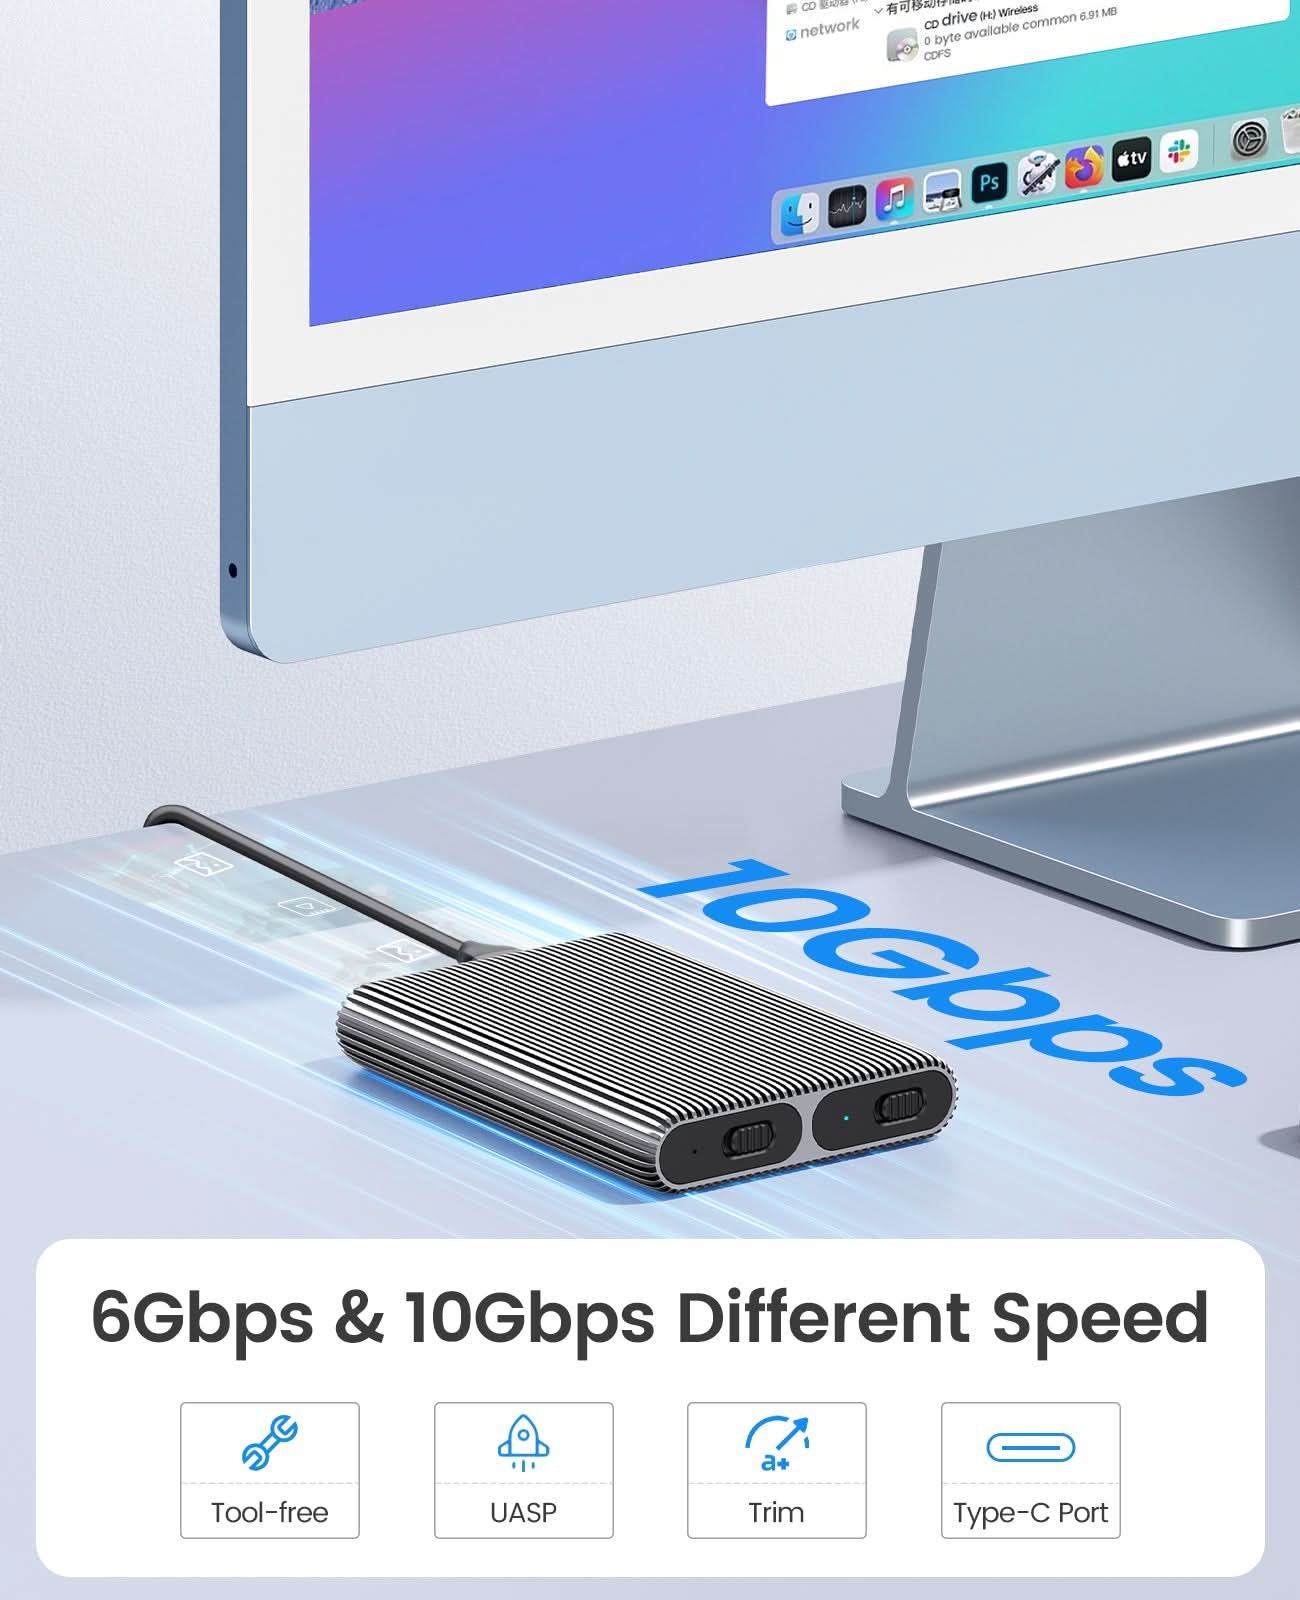
  • Dual Slot Support: Supports both M.2 NVMe (10Gbps) and M.2 SATA (6Gbps) SSDs with independent enclosures for each.
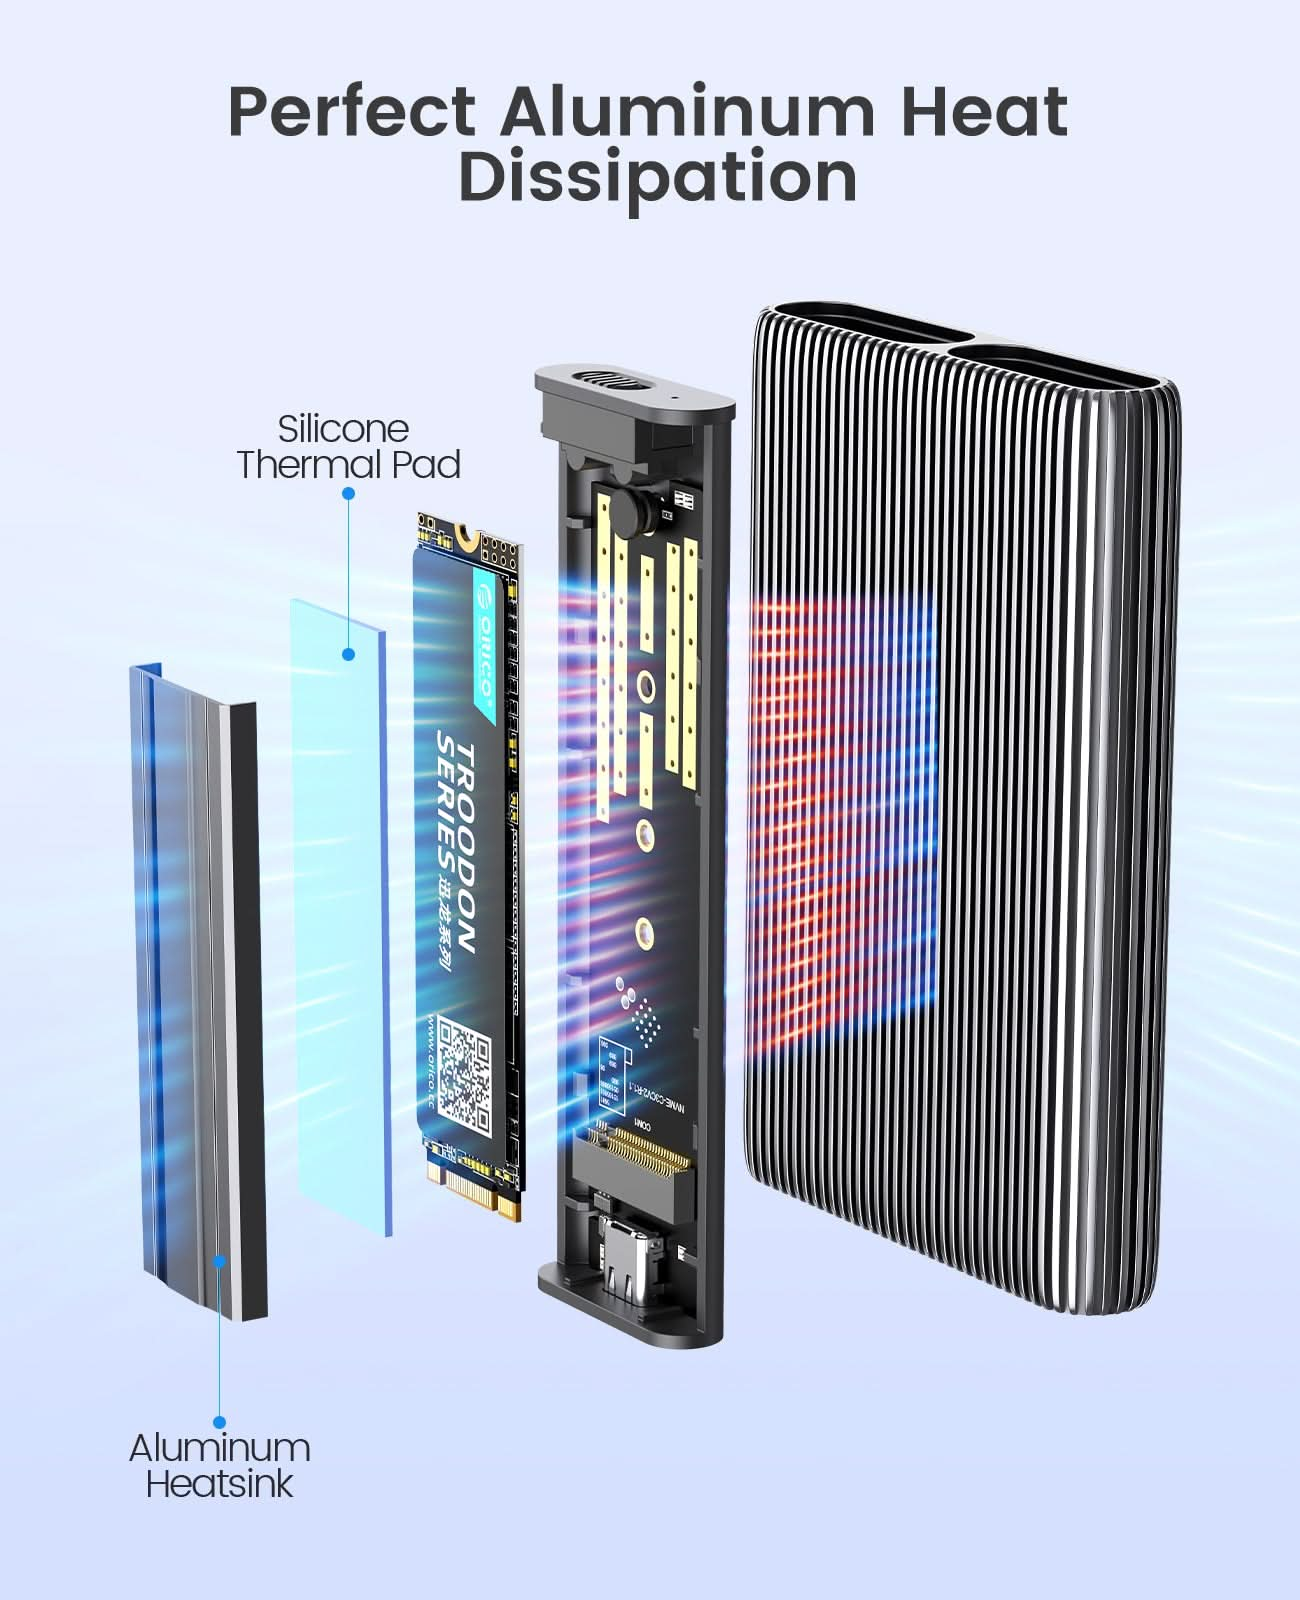
  • Heat Dissipation: Features an aluminum alloy design with heat sinks and silicone pads for effective heat dissipation.
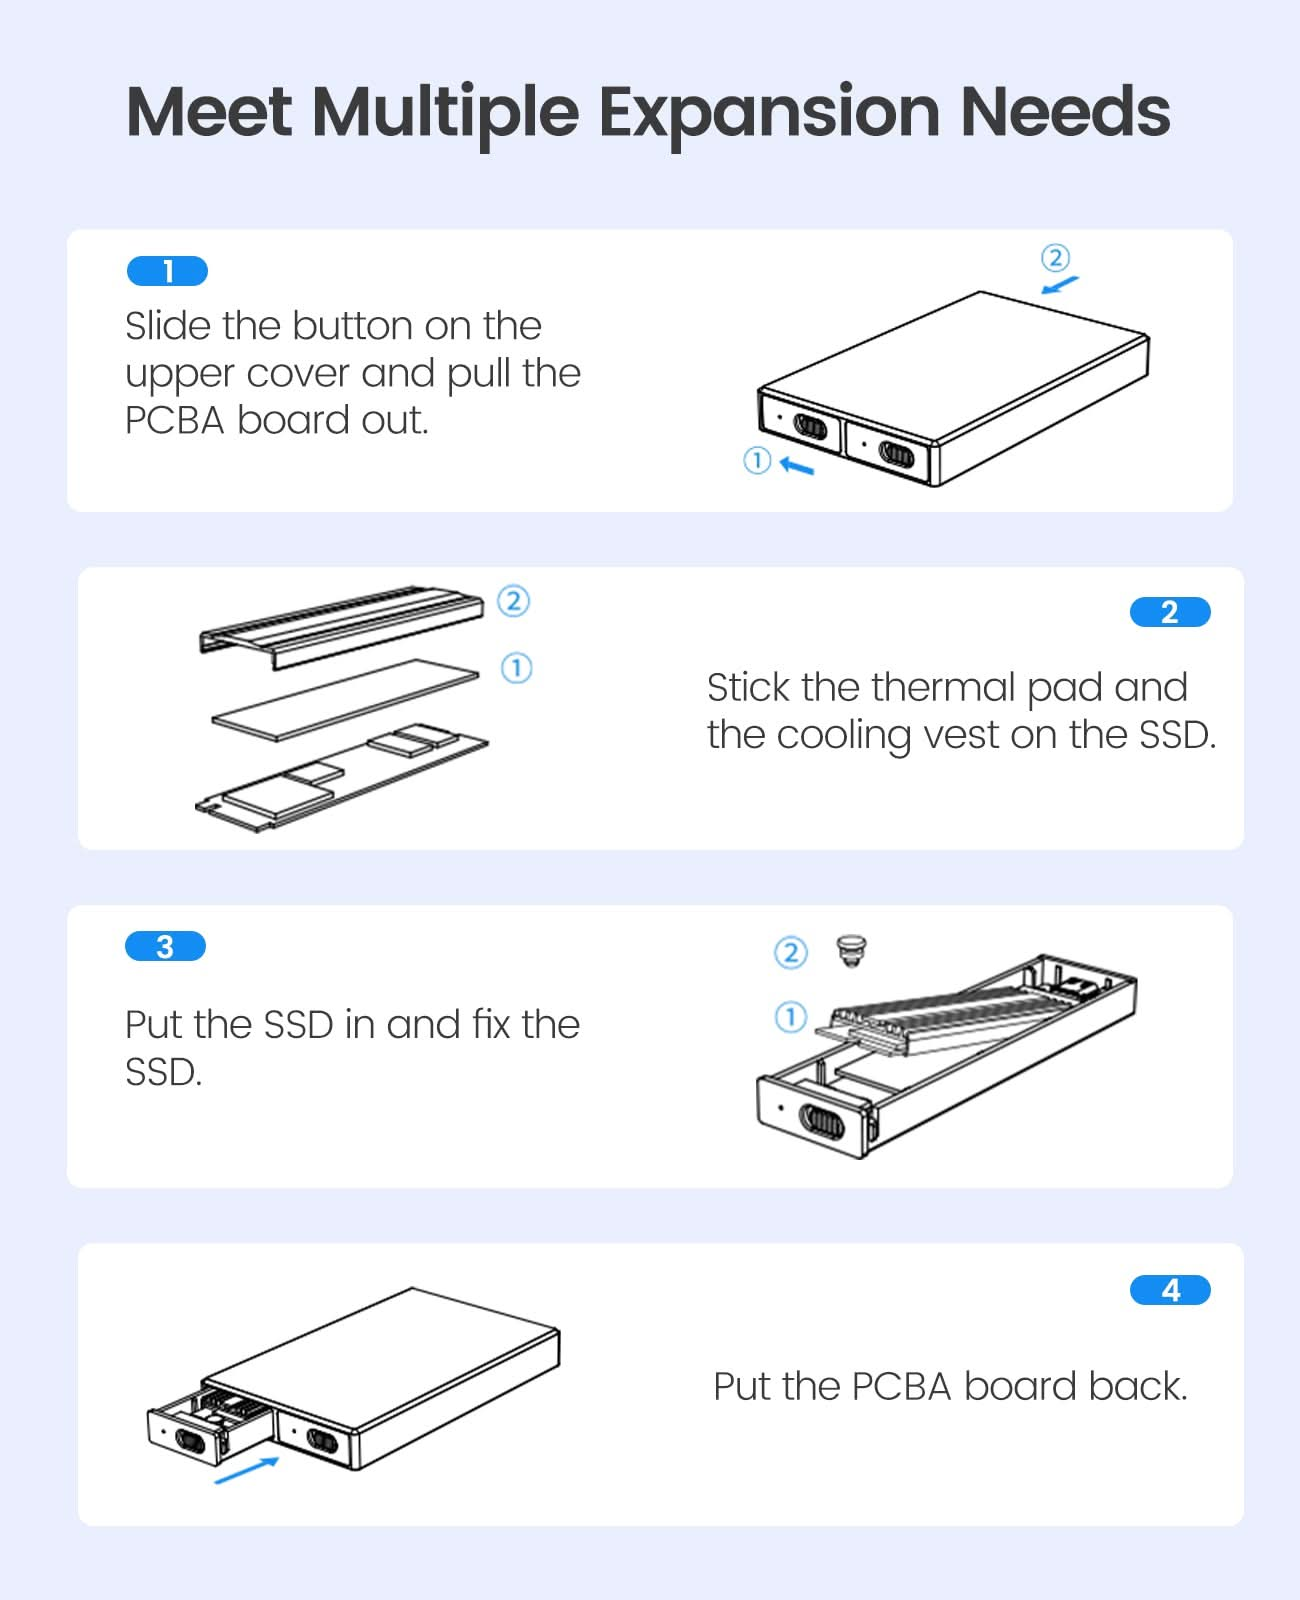
  • Tool-Free Installation: Allows quick installation by simply inserting the SSD and connecting the USB cable, with no driver needed.
  • High Speed: Supports speeds up to 6Gbps for M.2 SATA SSDs and 10Gbps for M.2 NVMe SSDs via USB3.2 Gen2 Type-C.
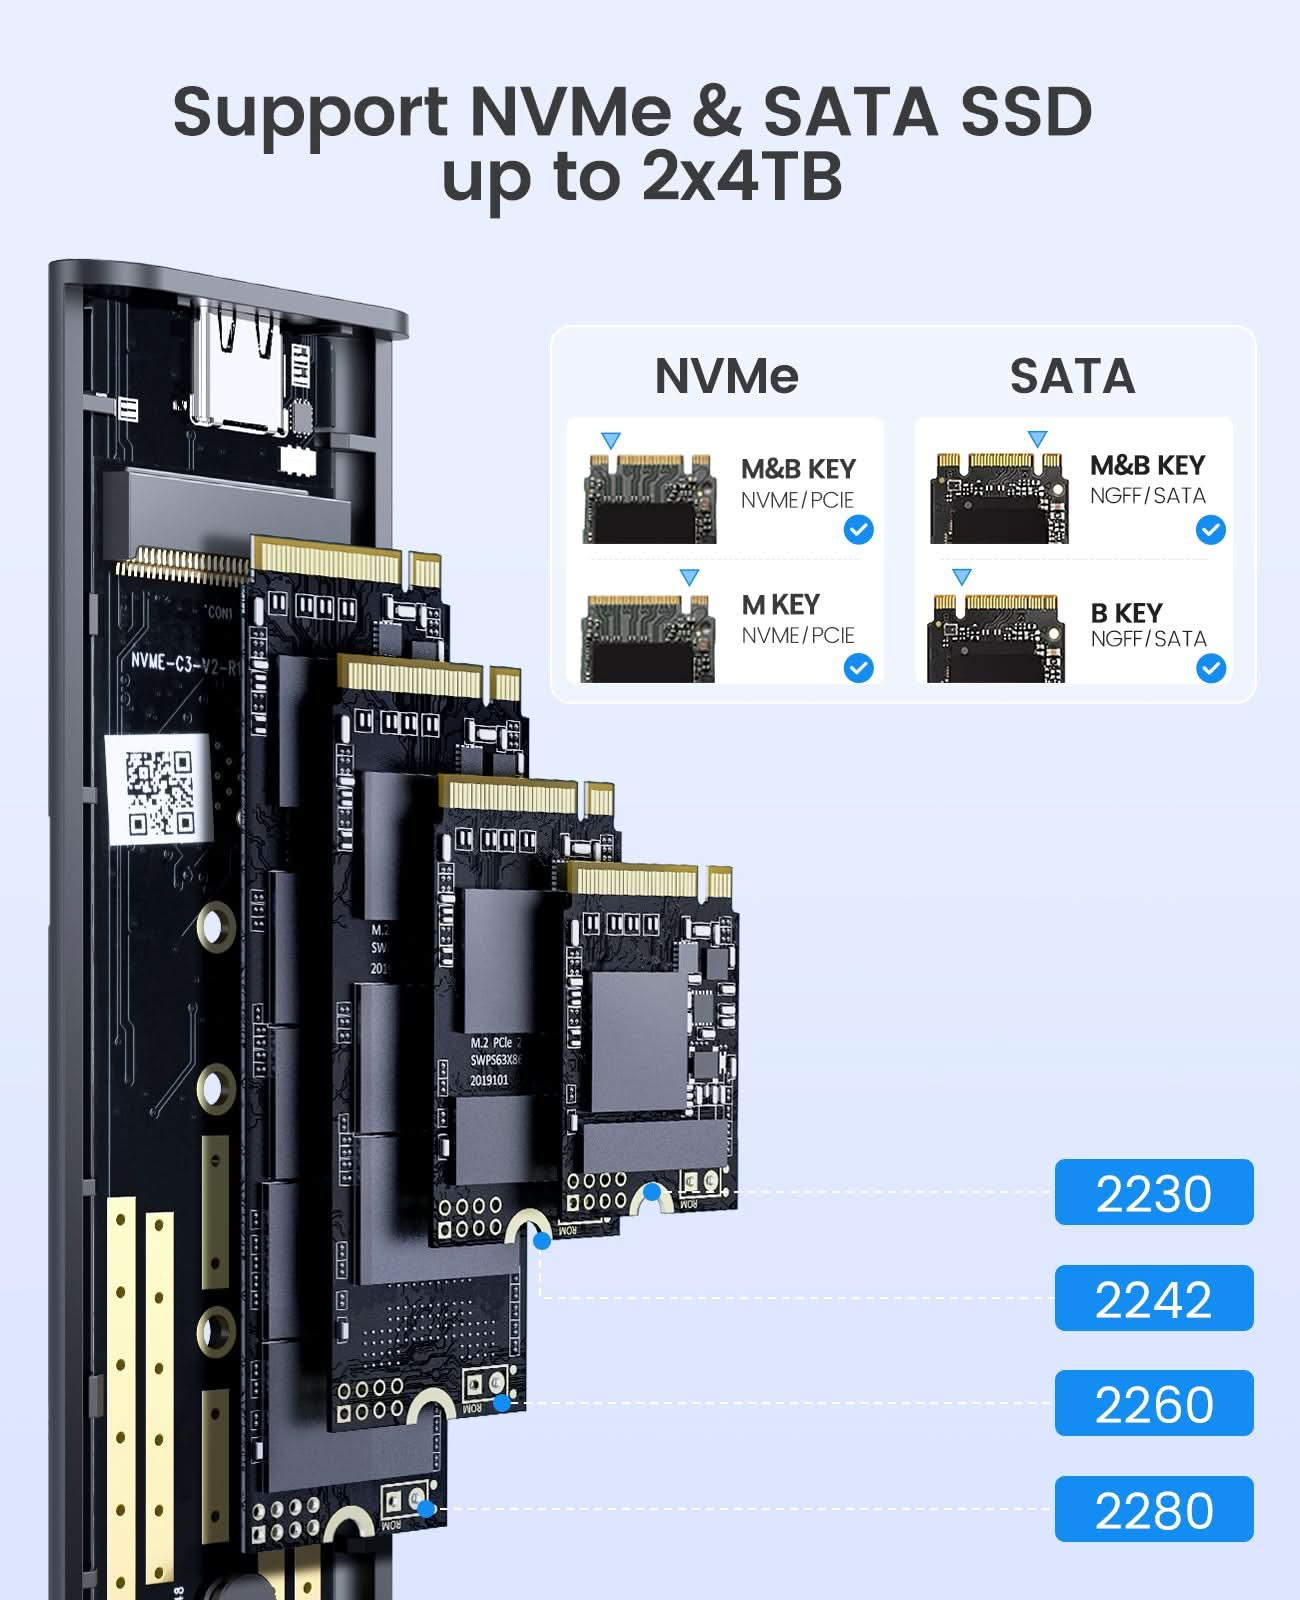
  • Wide Compatibility: Compatible with NVMe M-Key and SATA B-Key SSDs in sizes 2230, 2242, 2260, 2280, and works with Windows, Mac, Linux, and various devices.
Description


AM2-2SN

ORICO Tool-free Dual Bay M.2 NVMe SATA SSD Enclosure

1.Aluminum alloy design, which has a high-grade appearance and texture.

2.Tool-Free Installation, saving the trouble of screwing, easy to use, and portable.

3. With safety lock button design, which can be locked and extracted to prevent misoperation.

4. Support multi M.2 NVMe SSD, compatible with 30mm/42mm/60mm/80mm specifications.

5. Adopting USB3.2 Gen2 Type-C interface 10Gbps ultra-high-speed transmission technology, support for forward and reverse insertion, backward compatible with USB3.0/USB2.0.

6. Support SSD TRIM instruction and UASP acceleration.

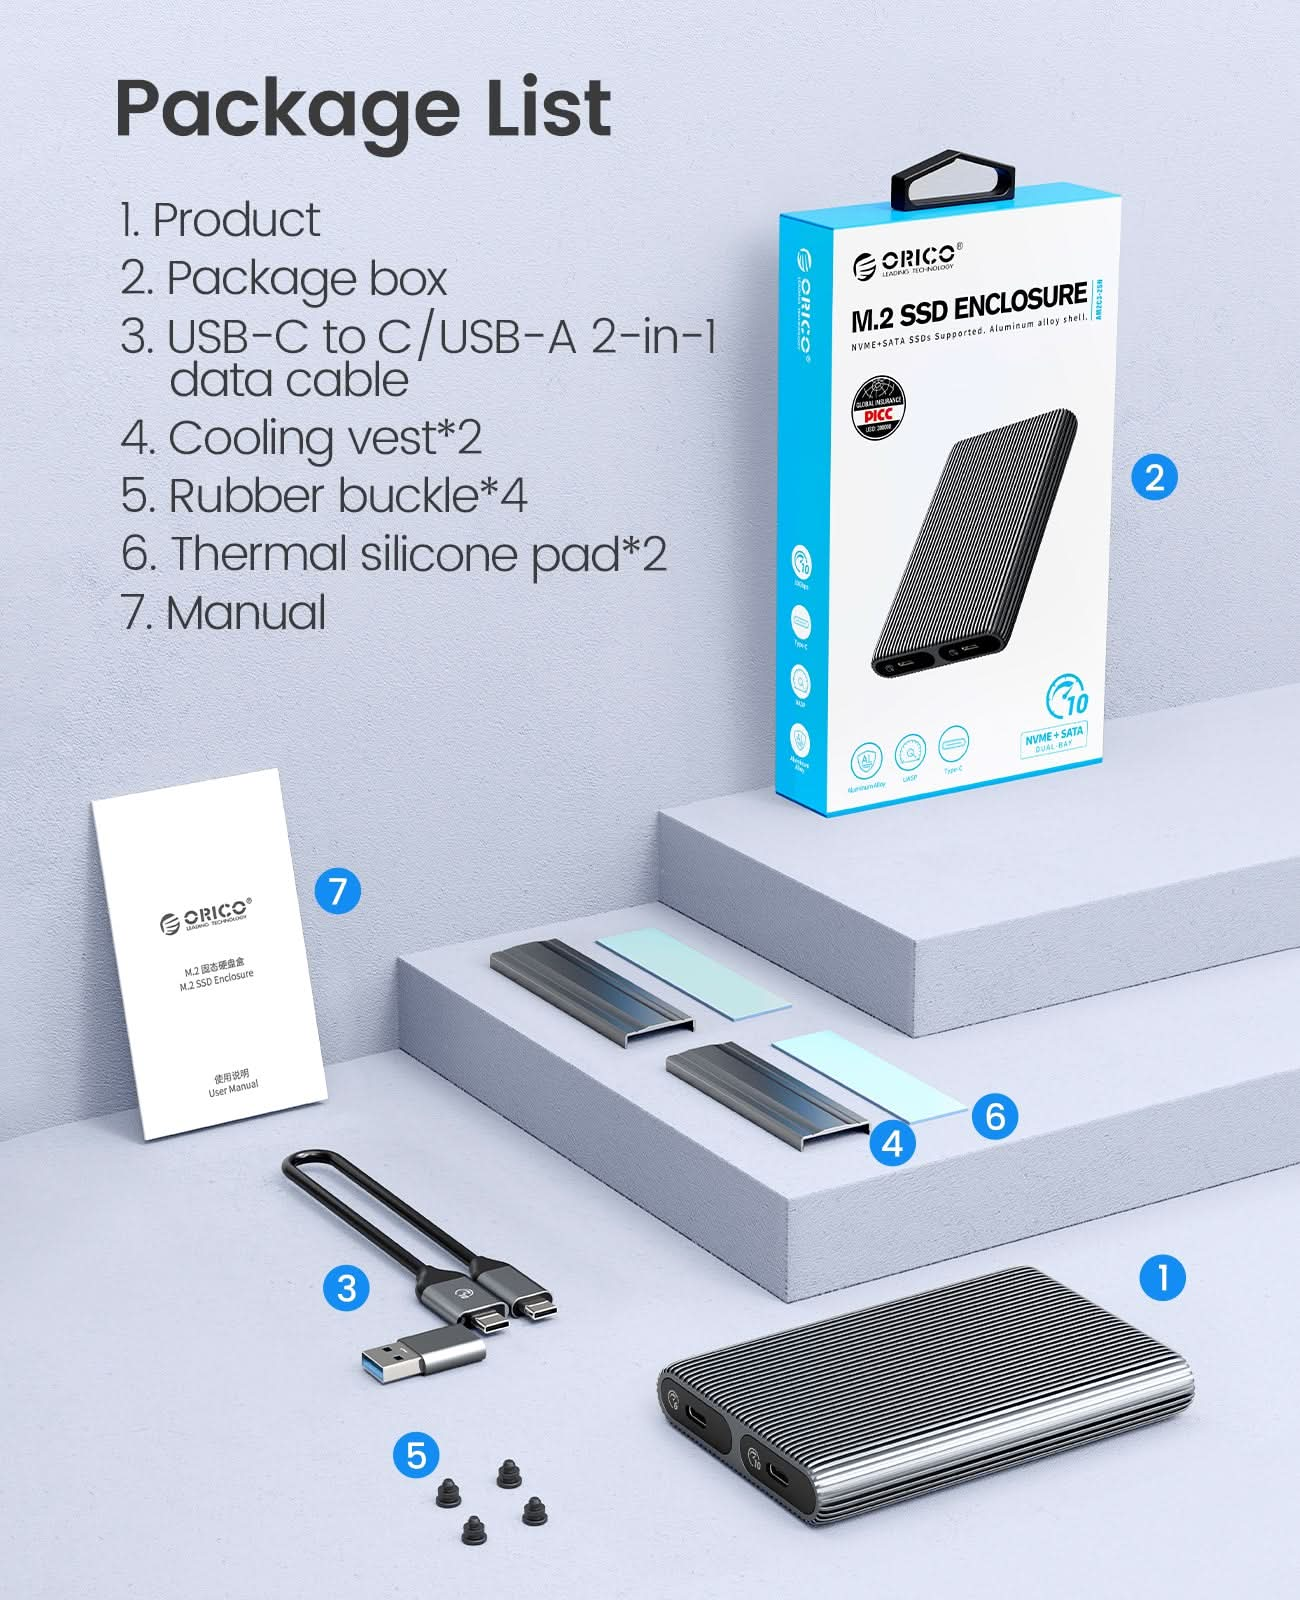
7. Plug and play, no driver required. Support hot-swap. 8. We provide Aluminum Cooling Vest(Heat Sink) and Silicone Thermal Pad to help against overheat.

AM2-2SN

Tool-Free Installation

Easy to use - Unlike some enclosures that force you to deal with small screws to take them apart and put them together, this uses a "tool free" approach where the two parts of the enclosure pop apart (though they're quite secure when together) and you're easily able to install/change the drive.

AM2-2N

Warm Tips

1. Please properly back up all data on the SSD to prevent data loss.

2. In any case, during data transfer, please do not unplug the M.2 SSD case from the PC, otherwise data may be lost. Please unplug the cable before taking out the SSD after use.

3. Once connected, your PC/Laptop's OS will initialize the M.2 SSD. This process may take a minute. You can access the data if the SSD is partitioned and the data is on the SSD.

4. Be careful to check compatibility before installing an SSD.

5. Please be as gentle as possible when installing the SSD to avoid scratching the components on the printed circuit board. When installing an SSD, be careful of static electricity. On the other hand, for safety reasons, it is also recommended to not connet device before proceeding with the installation.

AM2-2SN

ORICO Tool-free Dual Bay M.2 NVMe SATA SSD Enclosure

1.Aluminum alloy design, which has a high-grade appearance and texture.

2.Tool-Free Installation, saving the trouble of screwing, easy to use, and portable.

3. With safety lock button design, which can be locked and extracted to prevent misoperation.

4. Support multi M.2 NVMe SSD, compatible with 30mm/42mm/60mm/80mm specifications.

5. Adopting USB3.2 Gen2 Type-C interface 10Gbps ultra-high-speed transmission technology, support for forward and reverse insertion, backward compatible with USB3.0/USB2.0.

6. Support SSD TRIM instruction and UASP acceleration.

7. Plug and play, no driver required. Support hot-swap. 8. We provide Aluminum Cooling Vest(Heat Sink) and Silicone Thermal Pad to help against overheat.

AM2-2SN

Tool-Free Installation

Easy to use - Unlike some enclosures that force you to deal with small screws to take them apart and put them together, this uses a "tool free" approach where the two parts of the enclosure pop apart (though they're quite secure when together) and you're easily able to install/change the drive.

AM2-2N

Warm Tips

1. Please properly back up all data on the SSD to prevent data loss.

2. In any case, during data transfer, please do not unplug the M.2 SSD case from the PC, otherwise data may be lost. Please unplug the cable before taking out the SSD after use.

3. Once connected, your PC/Laptop's OS will initialize the M.2 SSD. This process may take a minute. You can access the data if the SSD is partitioned and the data is on the SSD.

4. Be careful to check compatibility before installing an SSD.

5. Please be as gentle as possible when installing the SSD to avoid scratching the components on the printed circuit board. When installing an SSD, be careful of static electricity. On the other hand, for safety reasons, it is also recommended to not connet device before proceeding with the installation.